
The antenna is the only new decision
If your fitters can install a wired panel, they can install this one. There is exactly one part in the box they have not met before, and it is more forgiving than it looks.
A wired panel that is mounted badly is an annoyance. The customer reaches further than they would like, and they live with it.
A radio link that is mounted badly fails somewhere else entirely — at the front of the vehicle, at the winch, thirty metres from the driver’s door, at the exact moment the customer bought the thing for. And the call about it comes to whoever fitted it.
That is the case for spending five minutes on this before the first one goes in. This is a guide for the shops fitting the TC-SW8W and for the distributors answering their questions — not a consumer walkthrough.
What is actually different
Structurally, nothing. One control box near the battery, one thin signal cable through the firewall, one panel on the dash. If that structure is new to a fitter, wiring an 8-gang panel covers it properly, and none of it changes here.
What is new is a fourth part. The kit carries an antenna for the 433 MHz link, and the assumption people arrive with is that it is a stub on the lid of the control box. If that were true, the box position and the radio position would be one decision, and a box tucked behind a wheel arch would be a radio tucked behind a wheel arch.
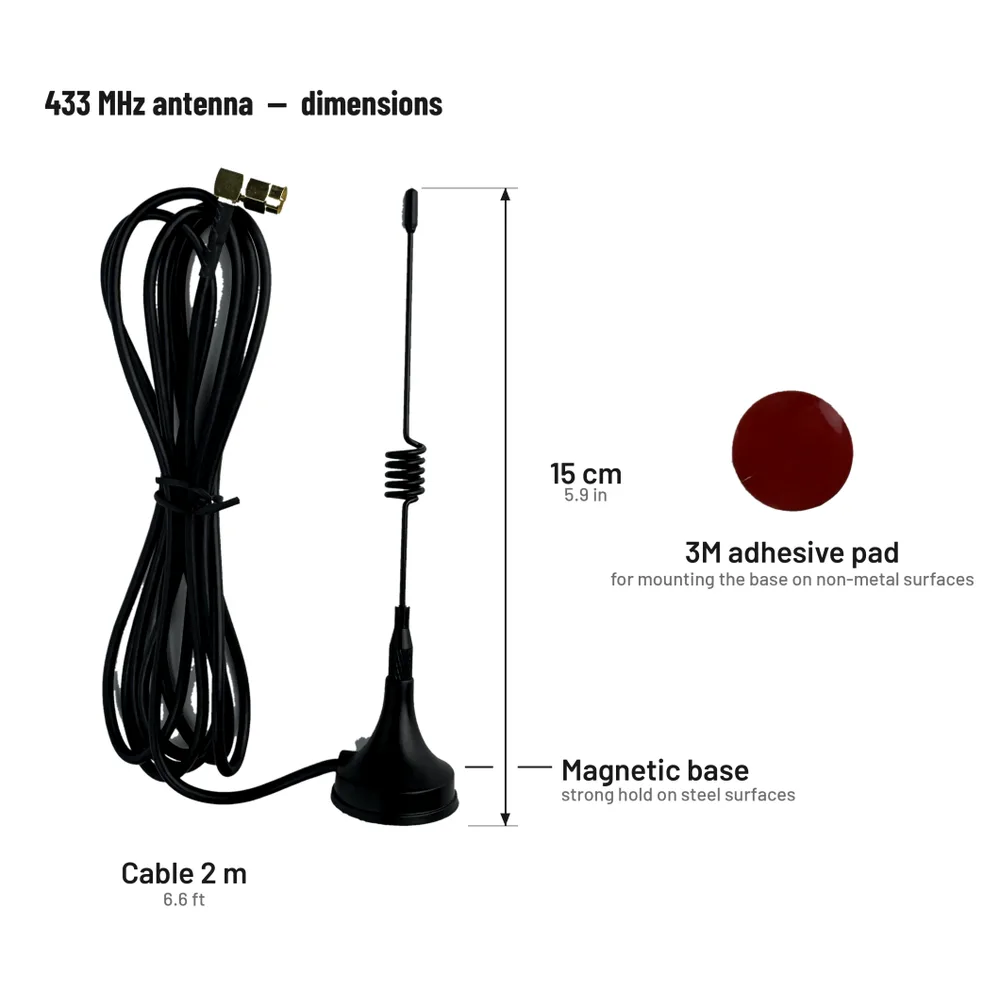
It is not. The antenna is 150 mm long, it has a magnetic base and a 3M adhesive pad, and it reaches the control box on a 2 m lead.
Which splits one decision into two:
- The box goes where the wiring wants it. Beside the battery, in whatever free space is around it.
- The antenna goes wherever there is room within two metres. Steel or plastic, flat or on its side.
Where the control box goes
Beside the battery, in whatever free space is around it. That is the honest version — there is no clever placement to work out.
Three limits, and none of them are tight:
Away from the exhaust and the turbo. The rated range is -40°C to 105°C, and that describes the electronics inside the box, not an invitation to strap it near a manifold. Under-bonnet ambient on a slow summer climb gets closer to the top of that range than most people expect.
Out of standing water. The box is IP65 — sealed against dust and against water from a hose. That is not a rating for sitting where a front wheel throws water at it, and it is not a pressure washer at a hand’s width.
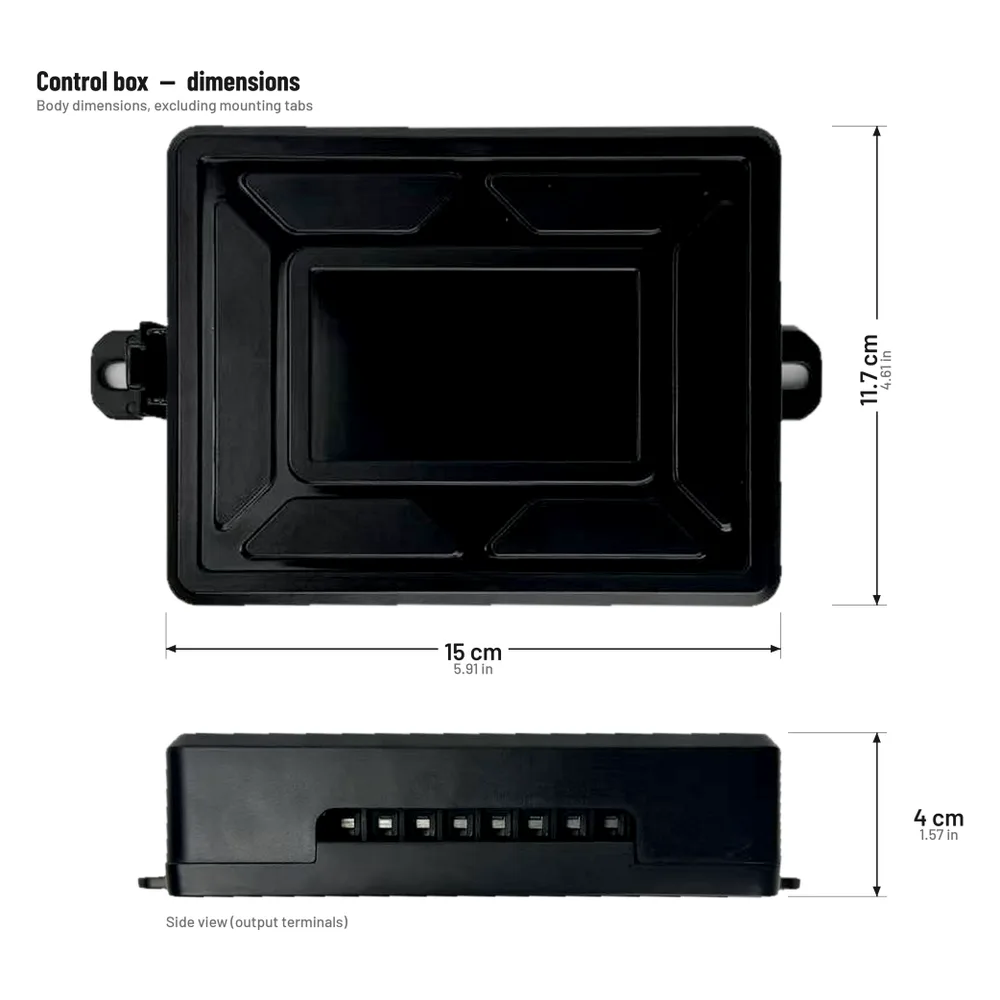
Measure the space, and measure the right one. The body is 150 × 117 × 40 mm. The mounting tabs stand outside that, one each side, and over the tabs it is 190 mm wide — the tabs are what you screw through, so 190 mm is the number that decides whether it fits. A slot cut to 150 mm will not take it.
The 40 mm is body as well, and that one needs no allowance above it: the antenna is a separate part on its own lead, so nothing sits on the lid.
Where the antenna goes
The published figure is approximately 30 m, line of sight, remote panel to control box. That is the number on the spec sheet and it is the one we stand behind.
What we have measured ourselves is more useful to a fitter: the link held at about 20 m with steel bodywork and a wall in the way. Not line of sight. Through the vehicle and through a building.
So the antenna is forgiving, and a fitter should not agonise over it. Two metres of lead, a magnet for steel, a 3M pad for everything else — inner guard plastics, a moulded liner, a fibreglass panel — and it can lie on its side if that is what the space allows.
The one habit worth building anyway: spend the lead. The easy mistake is to stick the antenna to the nearest surface, which is usually the same buried corner the box is in. The two metres exist so the antenna can be somewhere better than the box. Bring it up and out. It costs nothing at fitting time and it is the difference between comfortable margin and none.
Where the two panels go
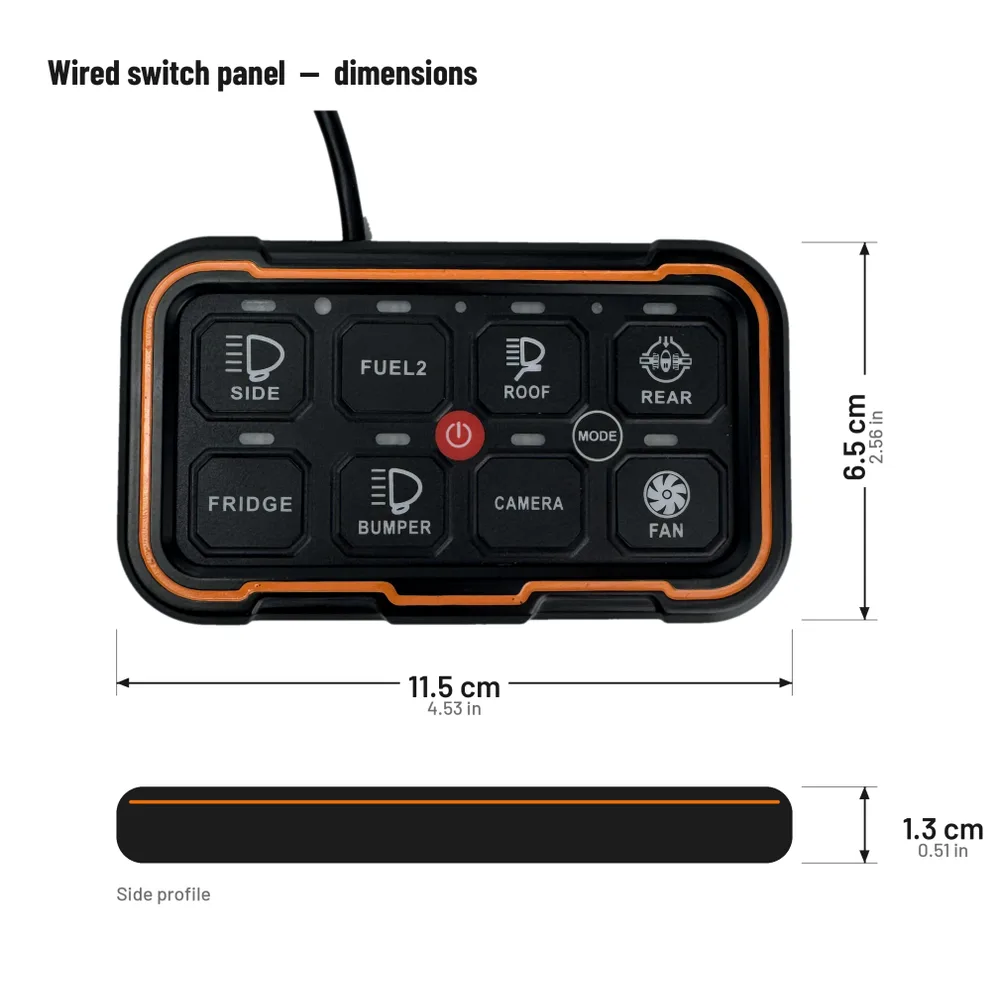
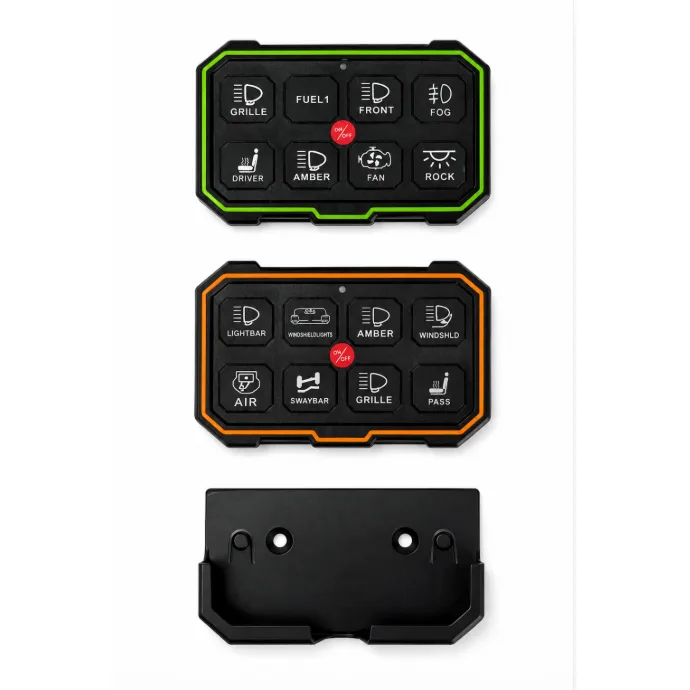
The wired main panel is 115 × 65 × 13 mm. It has to be reachable without a hand leaving the wheel and readable without eyes leaving the track. It is also the brains of the kit: the Bluetooth radio is in this panel, so the phone app talks to it, never to the remote.
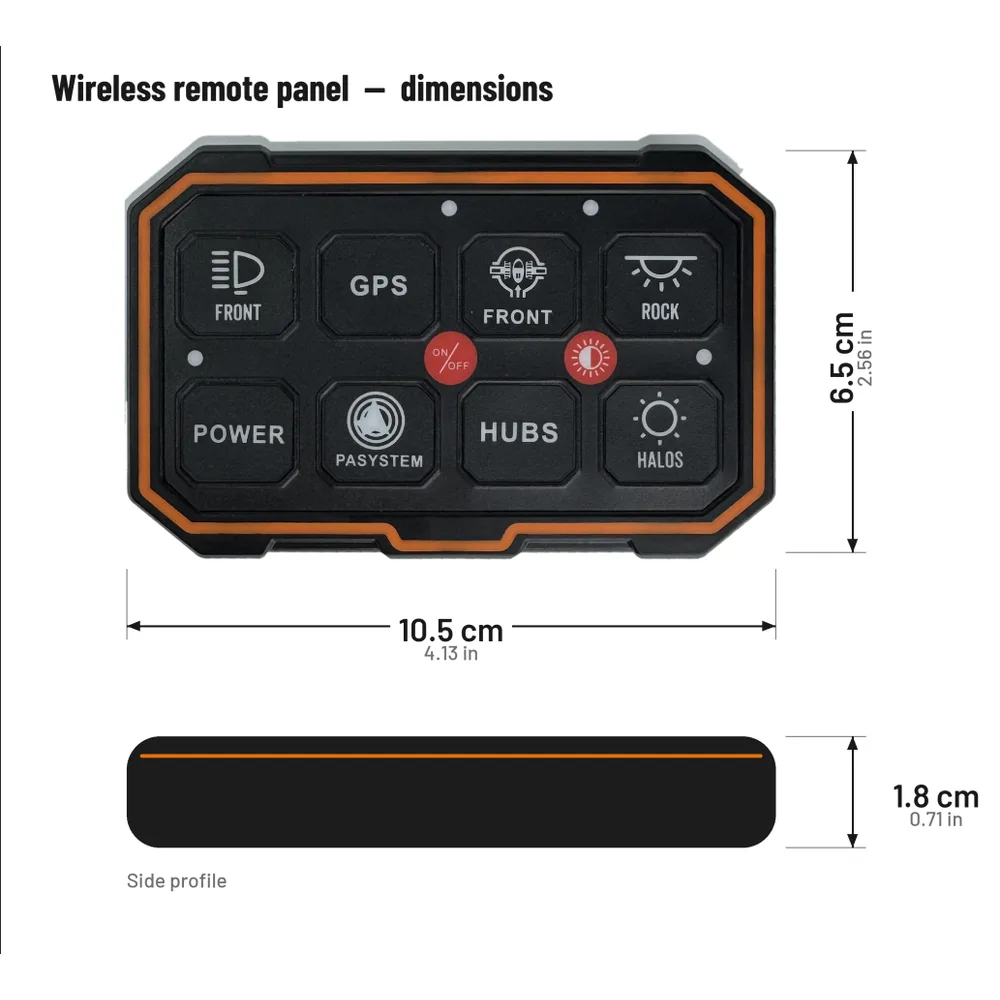
The remote is 105 × 65 × 18 mm — shorter than the wired panel and noticeably thicker, because the 1500 mAh cell lives inside it. It sits in a cradle and lifts straight out. The cradle screws down. Not tape, not magnets — fix it with screws and it stays where it was put, corrugations included.
Two things to settle before any adhesive is involved:
Icons first, holes second. Seventy icon decals come in the box. Lay out the circuits the build actually runs, agree the arrangement with the customer, then commit. Peeling a decal off a textured dash is not a five-minute job.
The two panels light differently. The wired panel reads an ambient light sensor and sets its own brightness. The remote does not — its backlight is white, in four steps, cycled high, medium, low and off with the brightness key. Someone will hunt the remote for an automatic setting and then ring you about it. There isn’t one, and nothing is broken.
Which channel gets what
The eight circuits are not equal, and that is the part worth planning before anything is wired: 2 × 30A, 2 × 20A, 2 × 10A and 2 × 5A, up to 60A total, 720–1440W, on 12–24V DC.
Compressor and light bar go on the 30A channels. Interior and rock lights go on the 5A ones. Where a build is still being specified, sizing a panel by current rather than switch count is the one to hand the customer.
One thing we do not publish, deliberately: cable size and fuse rating for a given install. Those depend on run length, load and local rules, and no figure has been confirmed to us that would be honest to print. Size the cable to the load and the run.
Before the battery goes back on
Most of this is the same as any panel. The last two are not.
- Every load on a channel rated for it, and nothing sharing a failure path it shouldn’t
- The 60A resettable breaker in the battery lead, near the battery
- Earth to bare metal, not through paint
- Grommet the signal cable where it crosses the firewall
- Charge the remote. About three hours to full, and it holds charge for over a year if it is switched off before storage — worth knowing for stock that sits
- Test the radio before the trim goes back on. Walk to the winch, walk to the tray, press a button from each. Moving an antenna takes two minutes with the panels off and an afternoon with them back on
That last line is the whole reason this article exists. The antenna is the only part of the kit whose position cannot be checked from the driver’s seat.
The paperwork, said plainly
The switch panels hold CE under the EMC Directive, an FCC Supplier’s Declaration of Conformity to Part 15 Subpart B, RoHS 2.0 and a REACH SVHC screening.
The 433 MHz radio sits in a different regulatory category, because it deliberately transmits — an FCC ID and CE RED rather than the certificates above. Those are in progress and not yet issued, and are available for volume orders. If a market wants that paperwork in hand before you commit to stock, ask us where it stands rather than assuming the panel certificates carry across. They do not, and they were never meant to. How the certification layers goes through it properly.
The short version for your fitters
Three positions, decided before anything is cut: the box, the antenna, the dash panel. Heat and water for the first, room within two metres for the second, hand and eyes for the third.
Then test the radio while the trim is still off.
Full specifications are on the TC-SW8W 8-way wireless switch panel page. Stocking decisions between the wireless kit and the wired panel it is built on are covered in wireless plus wired on the same platform. To build this under your own label, start the conversation early.
Two boxes, one loom
The control box carries the current and lives in the engine bay. The panel only carries signal, so the cable through the firewall is thin and easy to route. The remote carries nothing at all.
- 1
Control box — engine bay
Carries every amp. Mounts on the inner guard or firewall, fused channels facing down, battery leads straight to the terminals.
- 2
Wired main panel — within reach of the wheel
Signal only, so one thin cable through an existing firewall grommet. Mounts on the dash, a pillar or an overhead console.
- 3
Wireless remote panel — outside the vehicle
Same eight buttons as the main panel — one layout to learn. No wiring at all. It talks to the control box on 433 MHz out to about 30 m, so the tray, the winch and the camp lights are reachable from outside the vehicle.
- 4
Phone app — the same eight channels
Everything the panels switch, plus the setup the buttons cannot do:
- Backlight colour, per switch
- Icon, per switch — the same 70-icon set
- Mode, per circuit — toggle, momentary, flashing or strobe
- Grouping, so one tap drives several circuits
Over Bluetooth — and the radio sits in the wired main panel, not in the remote, so the app works close to the vehicle. When you need distance, the remote is the tool.